APrime’s LLM Kit, Part 2: Quickstart Guide to Self-Hosting AI Models in AWS

Senior Software Engineer
In this guide, we walk you through the process of self-hosting AI models in AWS, leveraging the power of ECS, GPU (graphics processing unit) instances, and Hugging Face‘s Text Generation Inference (TGI) service to create a robust and scalable AI deployment. This post focuses on how you can get started with a single GPU instance, but the patterns and modules used will allow you to both vertically and horizontally scale with ease.
This is Part 2 of our three-part series on hosting your own LLM in AWS. Visit the introduction in Part 1 to learn more about why it makes sense to host your own model and why we built these open-source tools, and Part 3 for an in-depth walkthrough and detailed discussion of the scripts and Terraform modules.
Table of Contents
Prerequisites
This guide is a supplemental resource for any user attempting to deploy a self-hosted Large Language Model (LLM) utilizing our free, open-source scripts and infrastructure files. You can access those via our public repo in GitHub. You can perform an end-to-end setup by running the quickstart.sh script and following instructions in the README.md file. This guide aims to provide additional context for those workflows.
Before diving into the setup, ensure you have the necessary prerequisites:
1. AWS Account
To host your own model using our provided scripts and infrastructure-as-code files, you will need an AWS account. If you already have an AWS account for your organization, you are good to go! If not, you can sign up for an account at the AWS registration page.
2. AWS Command-Line Interface (cli)
For the following, we assume you are using AWS, have the aws cli installed, and have configured it with credentials for your account. If you need assistance, please visit the AWS CLI setup guide.
3. Terraform
We’ll be using Terraform in this guide to automate the setup process. Our quickstart guide includes a script that manages these steps for you. If you’re familiar with Terraform and would prefer to dive into the nitty gritty details of infrastructure setup, we recommend skipping ahead to the next post in this series: BLOG TITLE
In our Terraform examples we make heavy use of the AWS community supported Terraform modules which simplify many of the complex, common setup tasks.
4. Quota Increase for GPU Instance
To run AI models efficiently, you’ll need a GPU instance and would be required to request a quota increase for a suitable GPU instance type on AWS. Spot instances can significantly reduce costs, and the g4dn.xlarge instance type is a good starting point.
While our tooling and quickstart guide provide the automated option to request additional capacity for GPU instances (G and VT Spot instances), we recommend for you to increase your quota manually if you still do not have enough capacity. If you are managing the process manually, make sure to select an instance type that includes an NVIDIA GPU. For more details on GPU instance types, visit the AWS documentation.
5. Domain Registration in Route 53
A registered domain in AWS Route 53 is required for secure access to your services via the Application Load Balancer (ALB). If you don’t have a spare domain, you can easily register a new one. This domain will also be used to access the secure UI interface for any model. For a guide on how to register a domain in Route 53, please visit the AWS documentation.
Note: If you do not have a domain, you can still access the UI by visiting it directly over HTTP. While this is fine for demo / testing purposes, we do NOT recommend using this in production.
6. VPC
You will need to create a Virtual Private Cloud (VPC) – or use the default VPC for your account – and take note of the subnets to which you want to deploy. In general, these should be private subnets with a NAT Gateway attached and ALBs will be deployed to public subnets. In the following guides we refer to this VPC’s ID as var.vpc_id.
Simple Setup – Use APrime’s Open-Source Module
Quickstart Script & Terraform Module
To streamline the deployment process, we recommend using our open-source Terraform module. This module automates most of the steps required and makes it easier to get started. If you would like to see a more detailed guide of the steps and discussion of any decisions made within the module, please skip ahead to the next blog post in this series.
First, clone our demo repo. Feel free to have a look around but our quickstart.sh script will walk you through configuring the terraform module and deploying it.
> ./quickstart.shThe script will then show you the following options, with defaults included in parentheses:
Domains available:
"yourdomain.click"
Running: pipenv run cookiecutter .
  [1/10] project_slug (demo-llm):
  [2/10] region (us-east-2):
  [3/10] name (inference):
  [4/10] domain (): yourdomain.click
  [5/10] vpc_cidr (10.0.0.0/16):
  [6/10] Availability zones you want to use as a comma-separated list, uses all AZs in the region if left blank. ():
  [7/10] text_generation_inference_discovery_name (text-generation-inference):
  [8/10] text_generation_inference_port (11434):
  [9/10] nginx_port (80):
  [10/10] Enter the name of an S3 bucket you want to store your terraform state in (we will create it if it doesn't exist). If empty, terraform will store state locally. (): your-tf-state-bucket
Under-the-hood, we use cookiecutter to create a simple user-interface to help you easily configure the terraform module.
Once the module has been templated, it will then apply the Terraform changes, showing you the things it wants to create and prompting you for approval.
Plan: 88 to add, 0 to change, 0 to destroy.

Changes to Outputs:
  + alb_dns_name = (known after apply)
  + ui_url       = "inference-tgi-open-webui.yourdomain.click"

Do you want to perform these actions?
  Terraform will perform the actions described above.
  Only 'yes' will be accepted to approve.
Once the apply is done, we verify that the UI has spun up and give you the information you need to connect to it:
Apply complete! Resources: 88 added, 0 changed, 0 destroyed.

alb_dns_name = "inference-tgi-open-webui-123456.us-east-2.elb.amazonaws.com"
ui_url = "inference-tgi-open-webui.yourdomain.click"

Checking UI (https://inference-tgi-open-webui.yourdomain.click) is up!
https://inference-tgi-open-webui.yourdomain.click is up!
Go to https://inference-tgi-open-webui.yourdomain.click and sign up for an account. The first email + password you put in will create an admin account!

Don't forget to run the following when you are done: ./cleanup.sh
Using the UI & Admin Setup
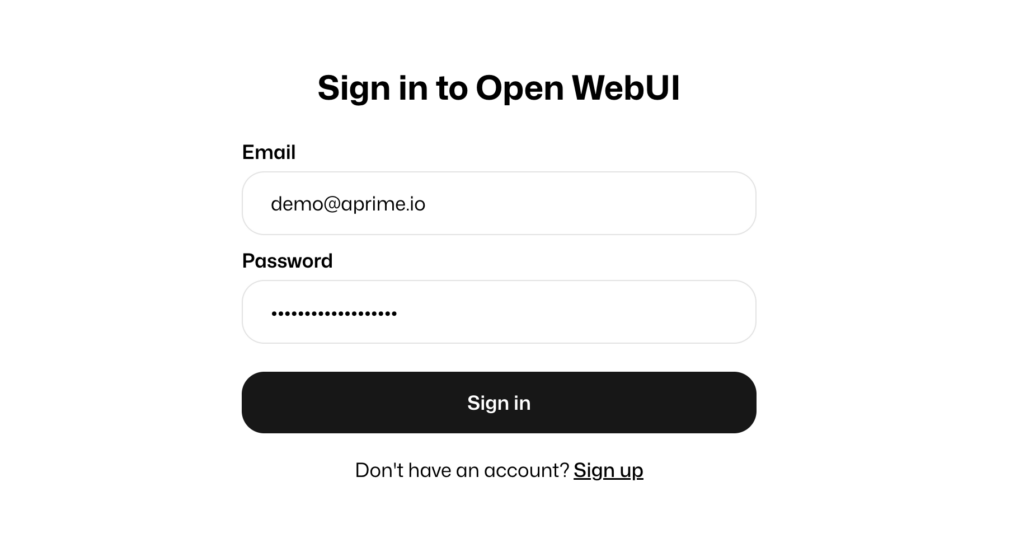
Now that everything is set up to go, you can connect to the UI. When you visit it for the first time, you will be required to set up an admin account. This initial setup is important as the admin user credentials will be needed to manage configurations and user access for your AI models. When you visit the UI for the first time, you will create the admin user by following the self-guided registration wizard.
In our example, we named the admin user demo@aprime.io. The screenshots below show the steps required to select a model and start prompting. You can log in to your Open WebUI interface using the credentials you just created:

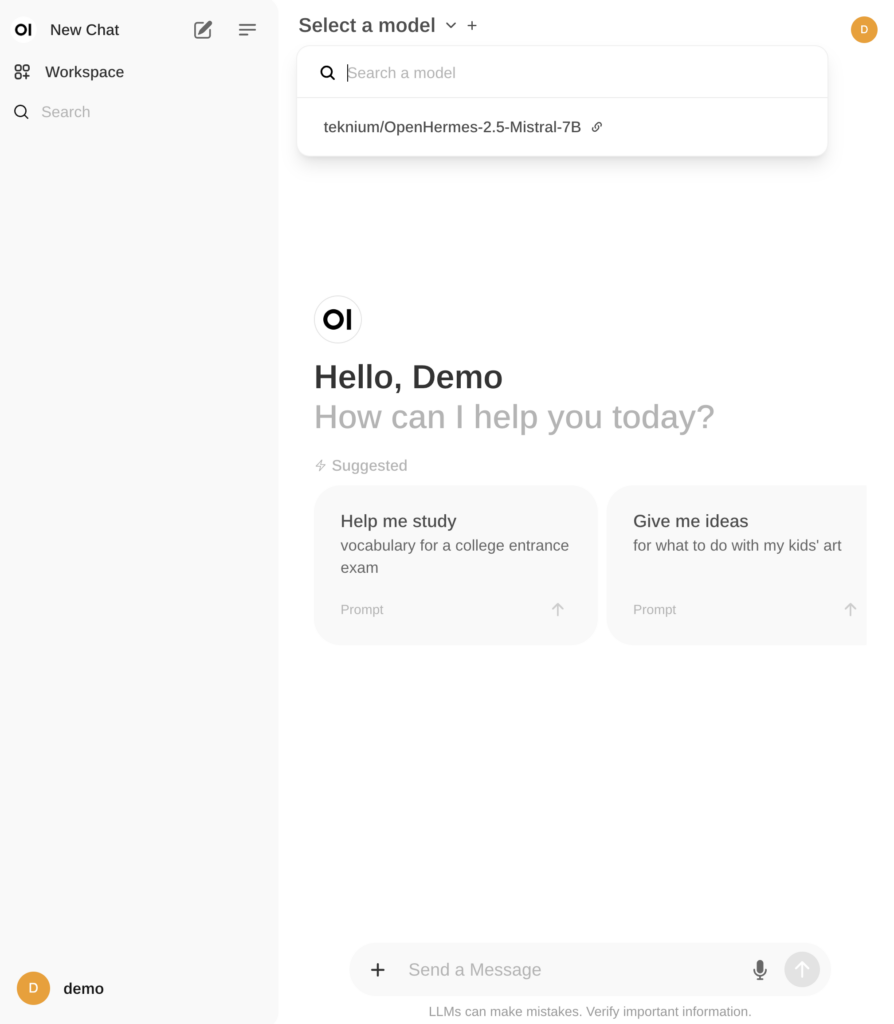
Once you are logged in, you can select a model from the dropdown menu at the top of the interface:

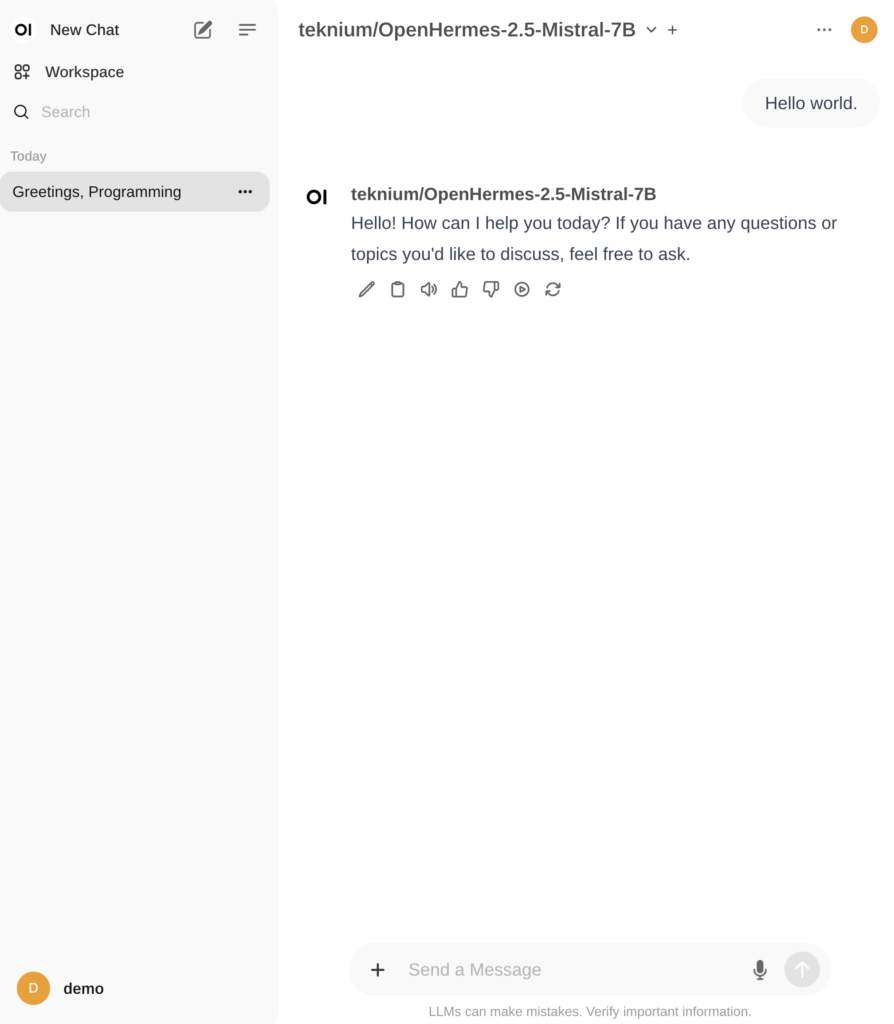
After you have selected a model, you are ready to start interacting with your own AI! 🚀

If you would like to add additional users or limit someone’s access to the UI, you can access User Management by selecting settings from the menu located at the top right of the screen.

Cleanup
In the repo, we also have an additional cleanup.sh script that will teardown all the things we created including
- Everything created by the
terraform apply - The S3 bucket for terraform state storage, but only if we created it for you
Future Enhancements
Thanks for following along so far, and please stay tuned for follow-up posts and additional free, open-source tooling to provide additional discussion and functionality related to
- Fine-tuning pipelines
- Retrieval-Augmented Generation (RAG)
- Monitoring TGI with Prometheus.
- Creating a user-facing chatbot on top of your private model(s).
These enhancements will further improve the performance and capabilities of your self-hosted AI models. If you would like to make a suggestion or leave feedback, please open a GitHub Issue on the repo or reach out to us via email at llm@aprime.io.
If you found the modules helpful, we encourage you to star the repo and follow us on GitHub for future updates! You can also visit Part 3 of this series for a deeper dive into each step of the LLM model setup.
APrime is here to help
We hope you found this quickstart guide and the provided modules and scripts useful in your first steps to hosting your own model and keeping your proprietary data safe.
APrime operates with companies of all sizes and provide flexible engagement models, ranging from flex capacity and fractional leadership to fully embedding our team at your company. We are passionate about innovating with AI/LLMs and love solving tough problems, shipping products and code, and being able to see the tremendous impact on both our client companies and their end users.
No matter where you are in your AI journey, schedule a call with our founders today to explore how we can make use of this powerful technology together!
Let APrime help you overcome your challenges
and build your core technology
Are you ready to accelerate?